中国唯一一家专业只做ARACLE认证和BDA实训的甲骨文金牌合作企业
(二)软件安装环境准备
操作系统:Red Hat Enterprise Linux6.4-64位
软件及安装包:
VirtualBox-4.3.12-93733-Win.exe
SecureCRT
xmanagerenterprise3.0/4.0/5.0
p13390677_112040_Linux-x86-64_1of7.zip
p13390677_112040_Linux-x86-64_2of7.zip
pdksh-5.2.14-36.el5.x86_64.rpm
rhel-server-6.4-x86_64-dvd.iso
rlwrap-0.37.tar.gz

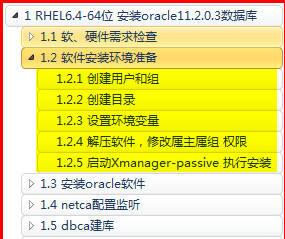
1.1 软件安装环境准备
1.1.1 创建用户和组
创建组
[root@rhel64 ~]# groupadd oinstall
[root@rhel64 ~]# groupadd dba
[root@rhel64 ~]# groupadd oper

创建用户 设置密码 oracle:oracle
[root@rhel64 ~]# useradd -g oinstall -G dba,oper oracle
[root@rhel64 ~]# passwd oracle

SecureCRT创建连接 使用oracle用户登录测试
[oracle@rhel64 ~]$ id

1.1.2 创建目录
[root@rhel64 ~]# mkdir -p /u01/app/oracle
[root@rhel64 ~]# chown -R oracle:oinstall /u01
[root@rhel64 ~]# chmod -R 775 /u01/app/oracle

1.1.3 设置环境变量
使用oracle用户连接 编辑/home/oracle/.bash_profile
[oracle@rhel64 ~]$ vi .bash_profile
unset TNS_ADMIN
export ORACLE_BASE=/u01/app/oracle
export ORACLE_HOME=$ORACLE_BASE/product/11.2.0/dbhome_1
export ORACLE_SID=PROD
export PATH=$ORACLE_HOME/bin:$PATH

[oracle@rhel64 ~]$ source .bash_profile
验证
[oracle@rhel64 ~]$ echo $ORACLE_BASE
[oracle@rhel64 ~]$ echo $ORACLE_HOME
[oracle@rhel64 ~]$ echo $ORACLE_SID
[oracle@rhel64 ~]$ echo $PATH

1.1.4 解压软件,修改属主属组 权限
root用户解压软件包 先后解压1、2
[root@rhel64 db]# cd /software/db
[root@rhel64 db]# ls

[root@rhel64 db]# unzip p10404530_112030_Linux-x86-64_1of7.zip
[root@rhel64 db]# unzip p10404530_112030_Linux-x86-64_2of7.zip
解压得到database目录 约2.5G

修改属主 属组 权限
[root@rhel64 db]# chown -R oracle:oinstall database/
[root@rhel64 db]# chmod -R +x database/


1.1.5 启动Xmanager-passive 执行安装
启动Xmanager - Passive
oracle用户设置DISPLAY 将图形化界面显示在宿主机
[oracle@rhel64 ~]$ export DISPLAY=192.168.6.6:0.0
[oracle@rhel64 ~]$ echo $DISPLAY

在oracle用户home目录执行安装操作
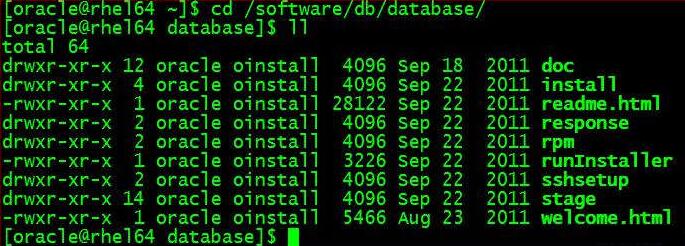
[oracle@rhel64 ~]$ cd /software/db/database/
[oracle@rhel64 database]$ ll

[oracle@rhel64 database]$ ./runInstaller

CUUG 优技培训
 CUUG -CHINA UNIX USER GROUP,是国际UNIX组织UNIFORUM的中国代表,是国内悠久的专业UNIX培训机构,被誉为中国UNIX 的摇篮。
金牌讲师
实操环境
院校合作
学校新闻
行业新闻
请输入您的手机号
申请试听